
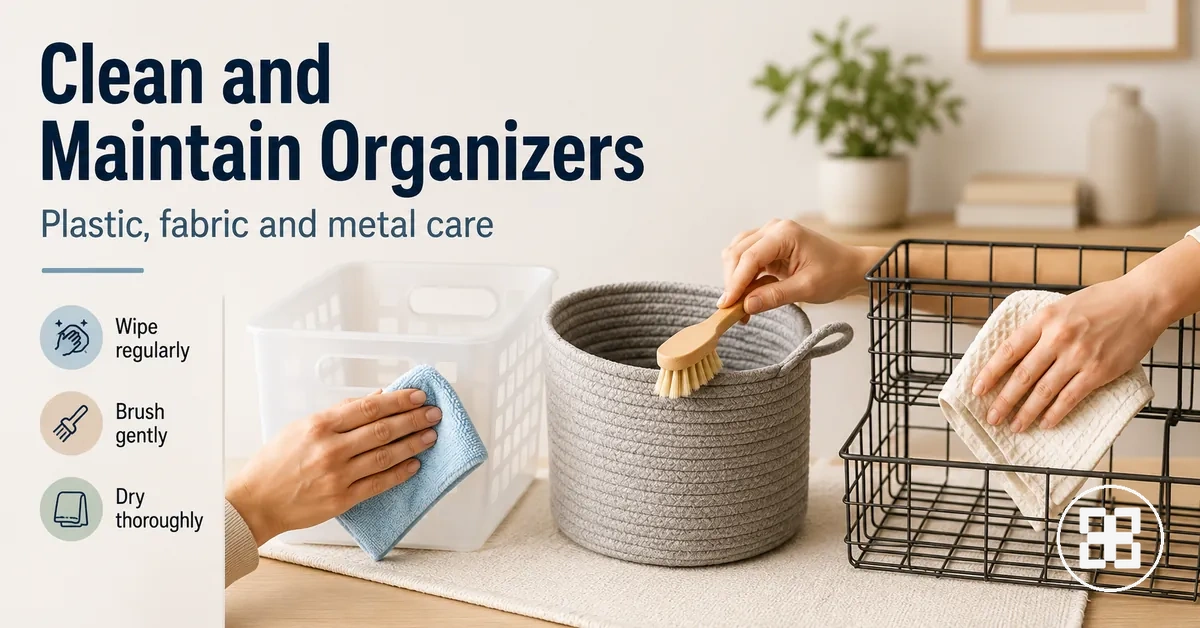
Cleaning and Maintenance for Home Organization Products
Cleaning and maintenance for home organization products is a material-sensitive care routine that helps keep storage containers and organizers clean, usable, and durable. The appropriate cleaning method is determined by the material, the type of residue present, exposure to moisture, and the product's normal use pattern. Plastic, clear, fabric, metal, drawer, and waterproof organizers therefore require different care approaches. Follow the manufacturer's care instructions whenever they specify cleaning limits, approved cleaners, washability, or drying requirements.
Plastic, clear, fabric, metal, drawer, and waterproof organizers therefore require different care approaches.
Dust, residue, moisture, odour, and surface damage require different maintenance methods because each affects materials differently. A soft wipe-down is often suitable for loose dust, while residue may require a mild cleaner that matches the surface material. Fabric organizers should be dried completely with good airflow to help reduce odour, and damaged metal coatings should be kept dry because exposed areas are more susceptible to rust. According to the American Cleaning Institute, selecting a cleaner appropriate for the material and removing any remaining cleaner residue helps maintain the surface before the product returns to use.
Checking the material and care limits before cleaning provides the safest starting point for ongoing maintenance.
For example, a drawer organizer with light dust may only need a damp cloth and complete drying, while a washable fabric storage bin may require cleaning according to its care instructions before being air-dried. The U.S. Centers for Disease Control and Prevention advises following manufacturer care instructions for both hard and soft surfaces because suitable cleaning methods differ by material. Checking the material and care limits before cleaning provides the safest starting point for ongoing maintenance.
Table of Contents
What to Check Before Cleaning Organizers
The safest cleaning method starts with checking the organizer material and its care limits before using water, detergent, heat, vinegar, bleach, or abrasive tools. What to Check Before Cleaning Organizers begins with a quick inspection that verifies material, care, and condition risks before you choose a safe cleaning choice.
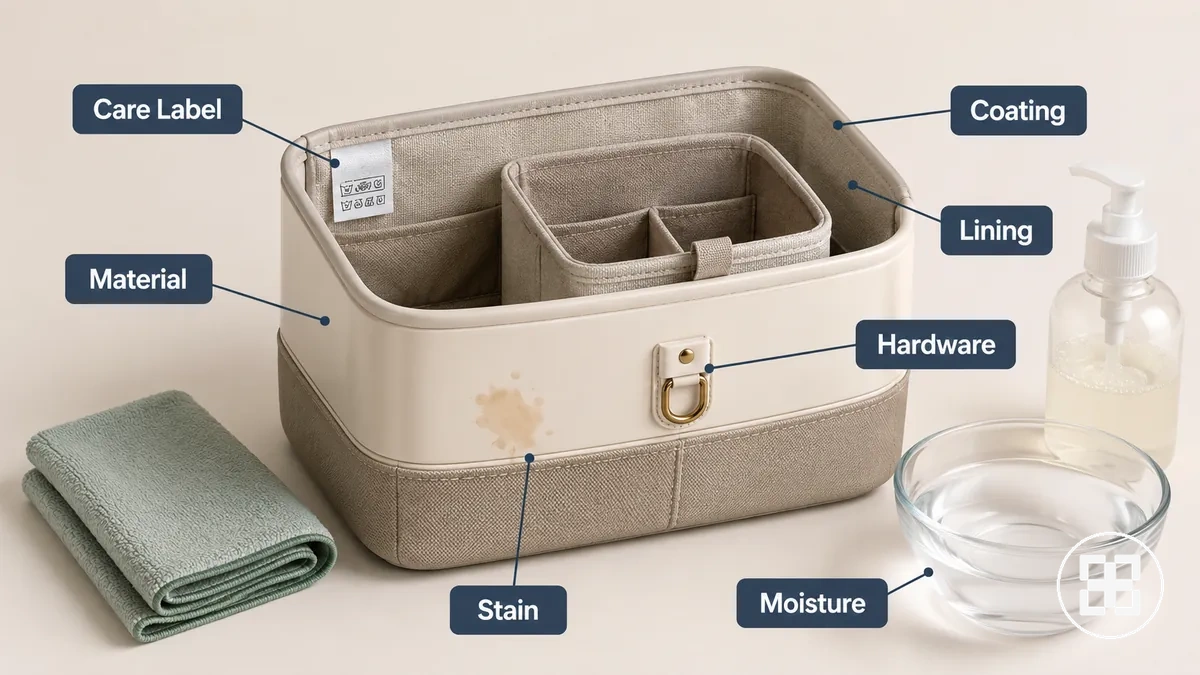
Labels, coatings, linings, removable inserts, adhesives, and previous moisture exposure can change the appropriate cleaner strength because these features react differently to water, detergents, and abrasion. A missing care label or an unknown surface finish is a clear reason to begin with the mildest suitable cleaning approach until the organizer material is identified. Existing stain, odour, or residue should also be checked before cleaning because each condition can require a different cleaning choice. Follow care instructions whenever they are available because they take priority over general cleaning advice.
- Check the care label for permitted cleaning methods, wash restrictions, and temperature limits.
- Identify the organizer material so cleaner strength matches plastic, fabric, metal, or another surface.
- Inspect the coating or surface finish for peeling, scratches, or wear that abrasive tools could worsen.
- Look for lining, removable inserts, or adhesives that can be affected by excess moisture or stronger cleaners.
- Examine hardware for exposed metal that should be dried thoroughly to help reduce the risk of rust.
- Check for existing stain, odour, residue, or moisture before selecting the cleaning method.
For example, a mixed-material organizer with a plastic body, fabric lining, and metal hardware should be inspected as separate surfaces before cleaning because each part may have different care instructions. Detailed guidance on choosing materials belongs in materials and cleanability; this section is limited to checking cleaning readiness before any cleaning begins.
Basic Cleaning Process for Storage Containers and Organizers
The basic cleaning process for storage containers and organizers is to empty, dust, wash, rinse, dry, and reset them before returning stored items. home organization products overview provides broader category context, while the shared sequence below applies to routine cleaning before any material-specific method is needed. Basic Cleaning Process for Storage Containers and Organizers follows the same core order for most routine household cleaning tasks.
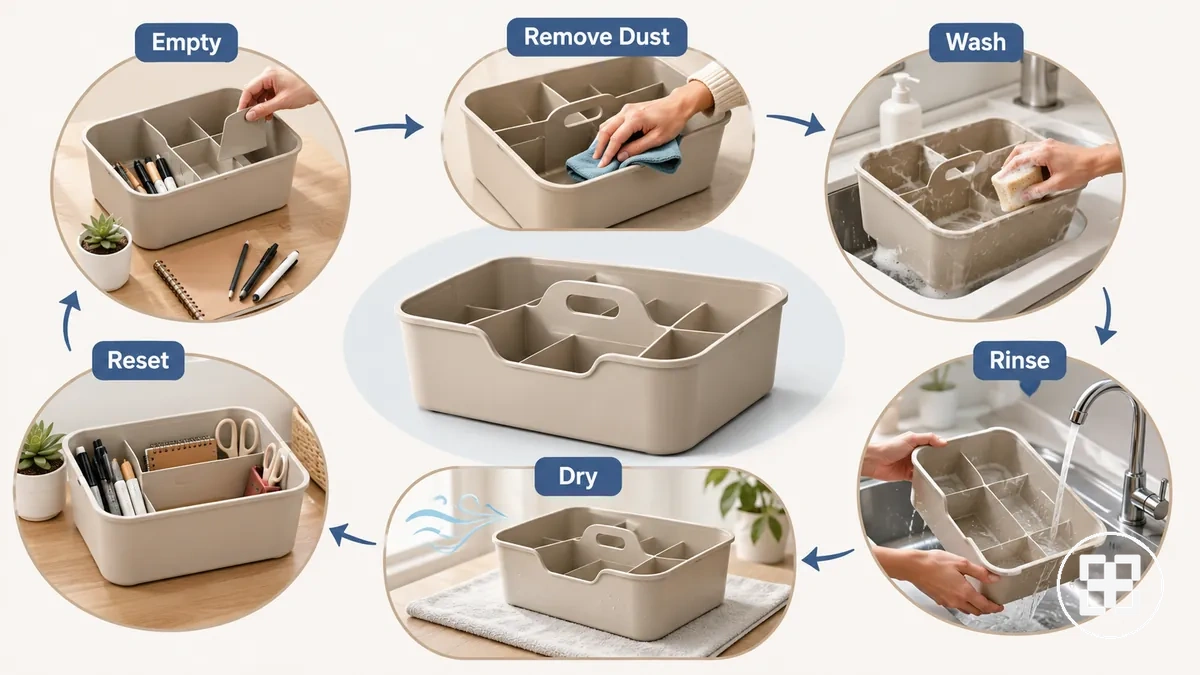
- Empty: Remove all stored items so every surface can be inspected and cleaned.
- Remove dust and debris: Wipe away loose dust, crumbs, and debris with a dry cloth or soft brush before washing.
- Wash: Clean accessible surfaces with warm water and a mild detergent using a non-abrasive cloth or sponge.
- Treat residue: Gently wipe sticky residue or general household grime without aggressive scrubbing that could damage the surface.
- Rinse: Remove detergent residue with clean water or a damp cloth when the material and care instructions allow.
- Dry and reset: Let the storage containers or organizers dry completely with good airflow before replacing stored items.
Light dust usually needs only a wipe down before washing, while sticky residue may require additional gentle wiping with the same non-abrasive tool. General household grime can normally be removed with mild detergent rather than stronger chemicals. Ordinary household cleaning is generally suitable with mild cleaning products, while disinfectants are not routinely needed for normal household surfaces according to the German Environment Agency (Umweltbundesamt). Always follow the care label if it limits water temperature, chemical use, soaking, or washing methods.
General household grime can normally be removed with mild detergent rather than stronger chemicals.
For example, a plastic storage bin with light dust can usually be emptied, wiped, washed, rinsed, dried, and reset, while an organizer containing fabric panels or metal components should switch to the material-specific method whenever the care label requires different care. Stop the shared process when the organizer material or finish has cleaning restrictions, then continue with the appropriate material-specific guidance.
Cleaning Methods by Organizer Material
The organizer material determines the cleaning method because each material has different water tolerance, cleaner strength limits, drying needs, and damage risks. Cleaning Methods by Organizer Material compares how plastic, clear acrylic, fabric, metal, drawer inserts, and waterproof bins require different care approaches based on their surface type and condition.
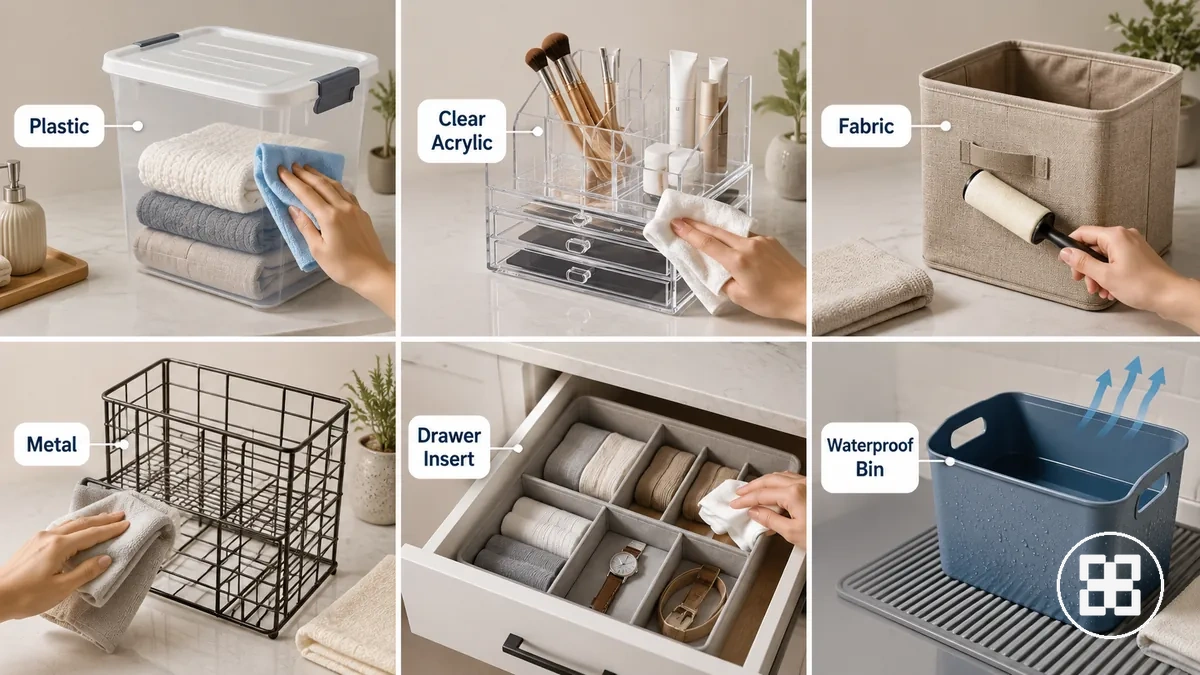
Water exposure, surface sensitivity, residue, and drying conditions change the safe method for each organizer material. Plastic and clear acrylic surfaces require attention to scratches and residue, while fabric needs moisture control and airflow to support a suitable maintenance outcome. Metal organizers require attention to coating condition and drying, while drawer inserts need checks for liners, adhesives, and mixed-material components.
| Organizer material | Cleaning method | Main caution | Drying or maintenance note |
|---|---|---|---|
| Plastic | Wipe or wash with a suitable mild cleaning method | Abrasive tools can increase surface damage risk | Dry after rinsing to reduce residue buildup |
| Clear acrylic | Clean with a non-abrasive cloth and gentle wiping | Scratches can affect clarity and create visible surface marks | Keep the surface dry after cleaning |
| Fabric | Use care instructions for washable or spot-clean methods | Retained moisture can contribute to odour | Allow airflow until the fabric is fully dry |
| Metal | Wipe clean and dry after moisture exposure | Damaged coatings can increase rust risk | Wipe dry joints and coated areas after cleaning |
| Drawer inserts | Clean according to the insert material and construction | Liners, adhesives, and fixed parts can limit moisture use | Check enclosed areas for residue before reuse |
| Waterproof bins | Use water-based cleaning when supported by the material care instructions | Water resistance does not remove the need for drying | Drain and dry before returning stored items |
Plastic, Clear, and Acrylic Storage Containers
Plastic containers, clear storage containers, and acrylic organizers should be cleaned with a gentle method that protects surface clarity and reduces damage risk. Use a non-abrasive cloth with mild detergent and rinse thoroughly when the material and care instructions allow. The main surface sensitivity to consider is that transparent materials can show scratches, cloudiness, and residue more clearly than opaque surfaces.
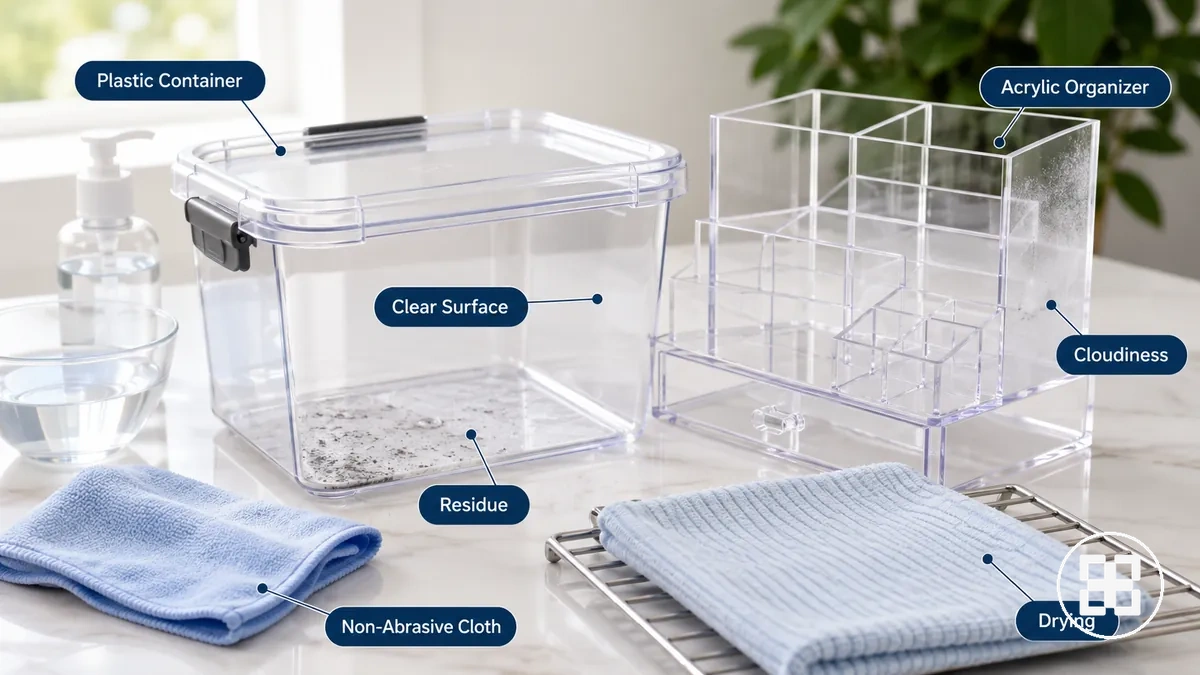
Residue, stains, cloudiness, and scratches can change the appropriate cleaning approach for plastic and acrylic surfaces. Sticky residue may require careful wiping, while abrasive tools can increase surface marks that affect transparency. Routine cleaning can remove dirt and residue, but it should be separated from restoration because permanent scratches or cloudiness may not be reversible through ordinary cleaning.
- Abrasive tools: Avoid rough scrubbers because they can increase scratches on plastic containers, clear storage containers, and acrylic organizers.
- Heat exposure: Avoid unsuitable heat sources because some plastic surfaces can be affected by excessive heat.
- Harsh cleaners: Check cleaner strength before use because stronger chemicals may damage sensitive finishes.
- Trapped odours: Dry containers fully after rinsing to reduce moisture-related odour problems.
- Permanent scratches or cloudiness: Cleaning can remove residue, but it may not restore permanently altered surfaces.
For example, a clear acrylic organizer used for bathroom storage may need gentle wiping, rinsing, and complete drying after residue removal, while a plastic container with food stains may require careful cleaning to remove the residue without damaging the surface. Broader material cleanability differences are covered in materials and cleanability; this section focuses only on cleaning plastic, clear, and acrylic surfaces.
Fabric Storage Bins and Washable Organizers
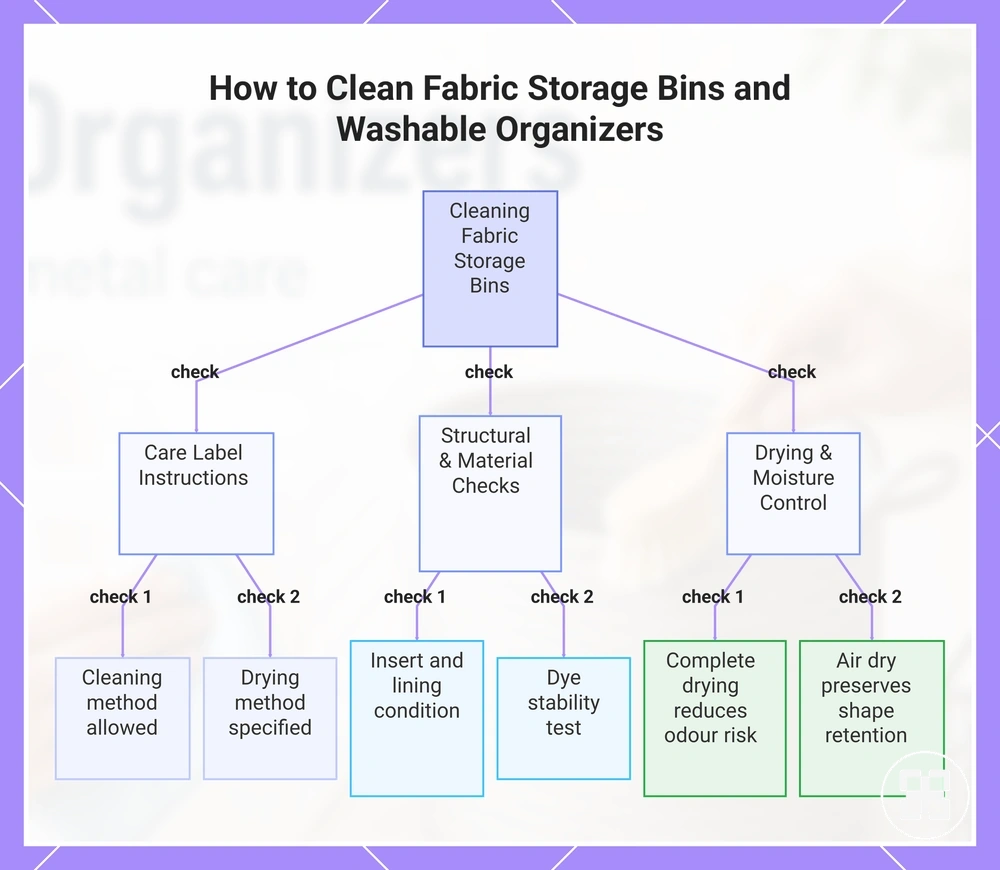
Fabric storage bins and washable organizers should be cleaned according to the care label, removable insert, lining, and structural support conditions before choosing between spot clean or a fuller washing method. The term washable does not automatically mean every fabric organizer supports machine wash, as construction and materials can limit moisture exposure. Check the fabric structure first to protect shape retention and reduce cleaning risks.
Check the fabric structure first to protect shape retention and reduce cleaning risks.
Moisture retention, odour, dye stability, and shape retention can affect how fabric organizers should be cleaned and dried. A fabric bin with a removable insert may need the insert handled separately, while lined or supported designs may require more cautious cleaning to avoid structural changes. Machine wash should only be used when the care label supports it, and air dry is often the safer drying approach when retained moisture could affect the fabric shape.
Moisture retention, odour, dye stability, and shape retention can affect how fabric organizers should be cleaned and dried.
For example, a closet fabric storage bin with surface dust may only need a spot clean approach, while a fabric organizer with a care label supporting machine wash may allow a different method after checking inserts and lining. A soft-sided bin used in a humid area should be dried completely after cleaning because trapped moisture can contribute to odour.
- Care label: Check whether the fabric storage bin supports spot clean, machine wash, or another cleaning method.
- Removable insert: Inspect and remove inserts when possible because they may have different moisture limits.
- Lining: Check internal lining materials because they can affect washing and drying conditions.
- Dye stability: Consider colour transfer risk before using detergents or full washing methods.
- Odour and moisture: Use ventilation and complete drying to reduce moisture retention problems.
- Drying method: Use air dry conditions when the care instructions require controlled drying to support shape retention.
This chart shows the key checks to perform before and during cleaning fabric storage bins, based on care label, construction, and drying factors.
Metal Shelf Organizers and Wire Storage
Metal shelf organizers and wire storage should usually be maintained by wiping surfaces clean and drying them fully after moisture exposure, unless the finish allows a different cleaning method. The cleaner type should match the coating condition because damaged finishes can increase rust risk. Keeping moisture away from metal surfaces, joints, and connection areas helps preserve the organizer finish.
The cleaner type should match the coating condition because damaged finishes can increase rust risk.
Coating condition, joints, welds, feet, and screws can affect how metal organizers respond to cleaning and damp environments. Residue buildup around joints or hardware may require careful wiping, while prolonged moisture exposure can increase rust risk on vulnerable areas. Damp rooms such as bathrooms require attention to ventilation and drying because trapped moisture can affect surface preservation. Use caution with stronger cleaners because finish tolerance differs between coated wire and other metal surfaces.
The following do-and-avoid list separates finish-safe actions from practices that can increase damage risks.
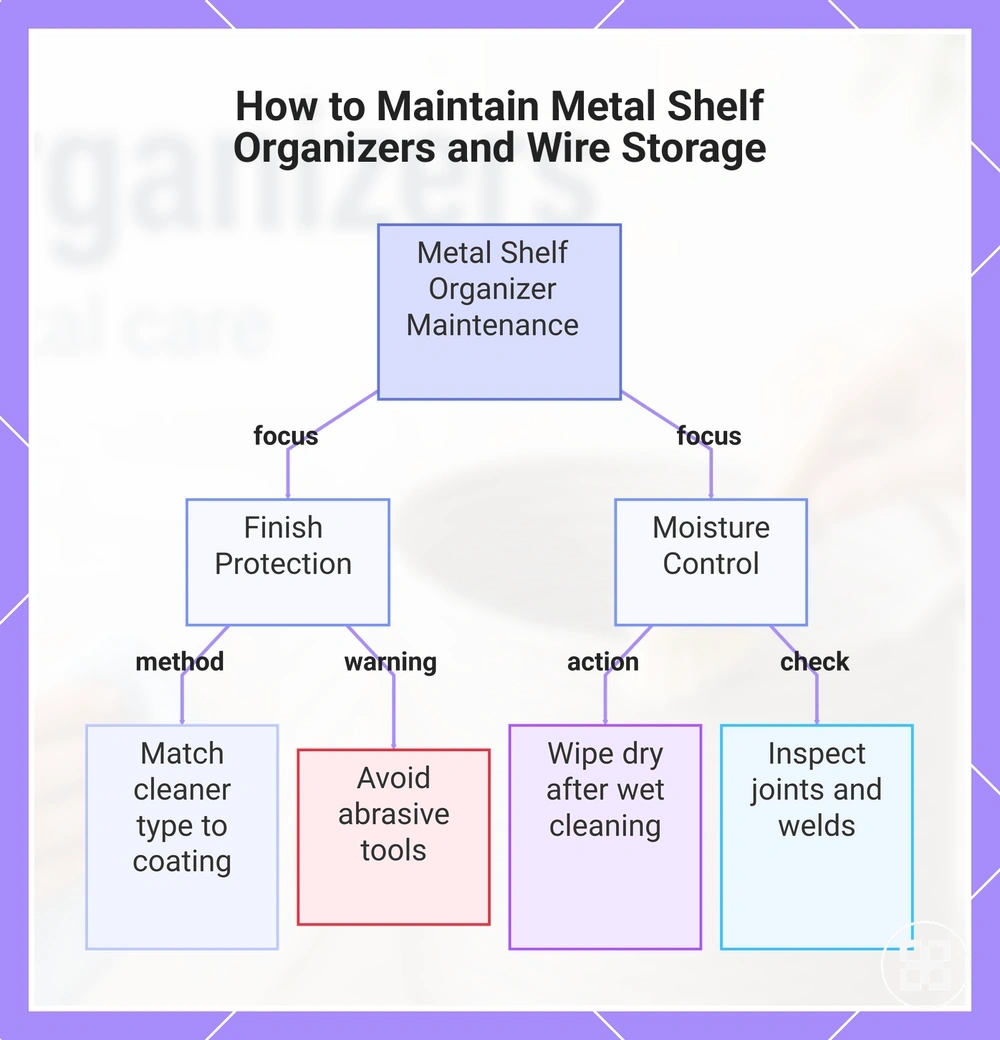
Metal Shelf Organizers and Wire Storage maintenance focuses on finish protection and moisture control rather than aggressive cleaning methods. The following do-and-avoid list separates finish-safe actions from practices that can increase damage risks.
- Do wipe dry: Dry metal organizers after wet cleaning because remaining moisture can contribute to rust formation.
- Do check joints and welds: Inspect these areas for residue buildup where moisture can remain.
- Do protect the coating: Match the cleaner type to the finish condition to help maintain the surface.
- Avoid abrasive tools: Rough cleaning methods can damage coatings and expose vulnerable metal areas.
- Avoid prolonged moisture: Do not leave wire storage damp because moisture exposure can increase rust risk.
This chart shows the two main maintenance focuses for metal shelf organizers: protecting the finish and controlling moisture, with key actions and warnings.
Drawer Organizers and Mixed-Material Inserts
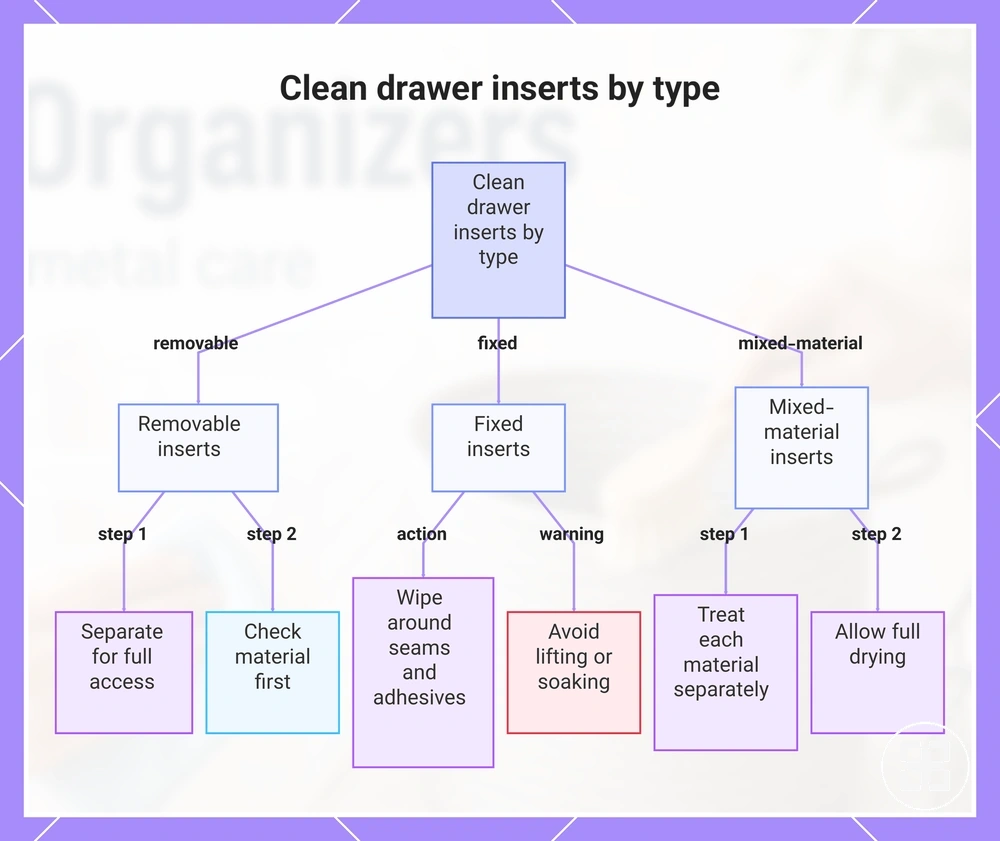
Drawer organizers and mixed-material inserts should be cleaned based on whether the insert is removable, fixed, or made from multiple materials. Removable insert types usually provide better cleaning access, while fixed inserts require more caution around seams, adhesive areas, and attached liners. The insert structure determines where crumbs, dust buildup, and residue risk need attention.
Allow cleaned areas to dry fully, especially around adhesive sections and non-slip bases.
For example, crumbs in a kitchen drawer, cosmetic residue in a bathroom drawer, or desk debris can collect inside compartments and along divider edges. A removable insert can be cleaned more directly after checking its material, while a fixed insert may require careful wiping to protect adhesive and liner areas. Mixed-material inserts need separate attention for each component because moisture exposure can affect different surfaces differently. Allow cleaned areas to dry fully, especially around adhesive sections and non-slip bases.
- Removable inserts: Check whether the insert can be separated before cleaning to improve access to compartments, edges, and hidden dust.
- Fixed inserts: Wipe around seams, adhesives, and attached parts without lifting, soaking, or disturbing fixed components.
- Mixed-material inserts: Consider each material section separately because dividers, liners, and bases may have different cleaning limits.
- Liners: Check drawer liners for crumbs, dust buildup, and residue before selecting a suitable cleaning method.
- Non-slip bases: Wipe non-slip surfaces carefully and allow them to dry to reduce residue and moisture-related risks.
This chart shows how to clean drawer organizers and mixed-material inserts based on whether the insert is removable, fixed, or made from multiple materials.
Drying and Resetting Organizers After Cleaning
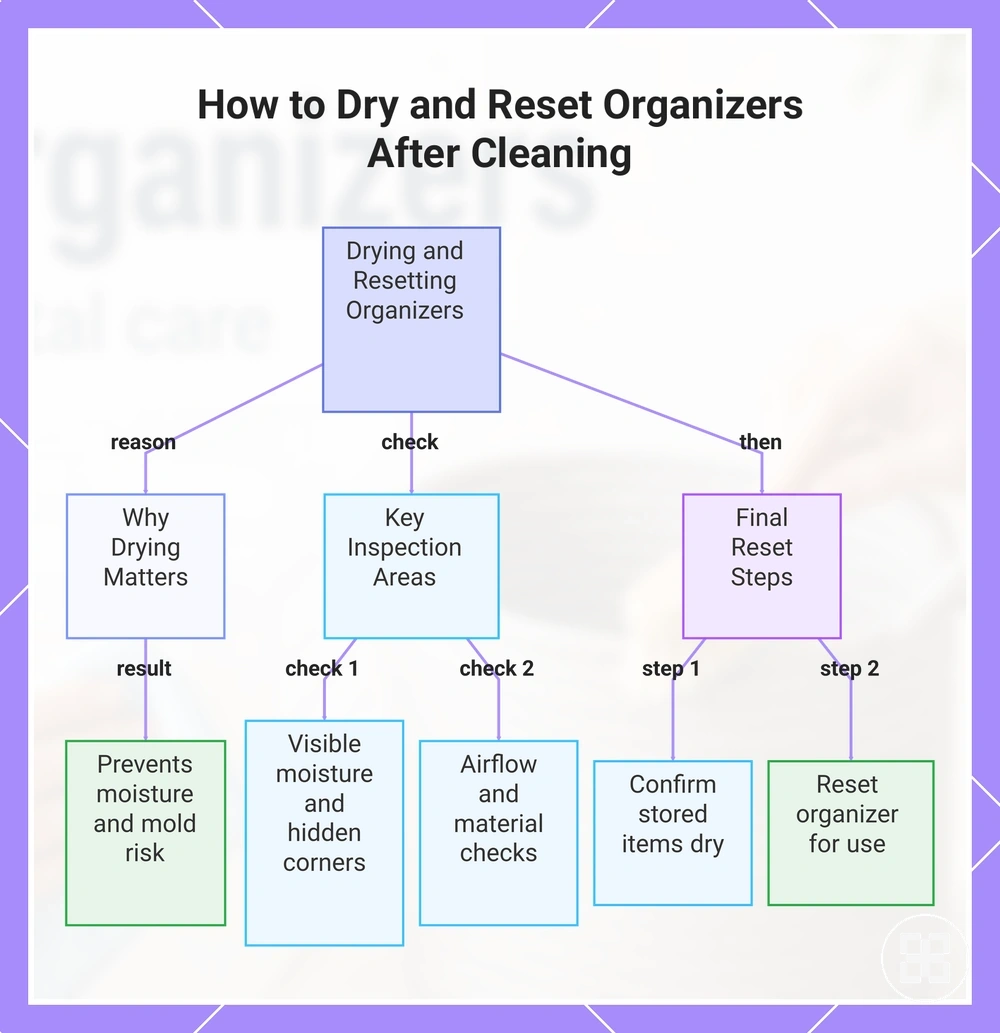
Organizers should be fully dry before stored items are returned because damp surfaces can trap moisture, odour, residue, and conditions that increase mould risk. Drying and Resetting Organizers After Cleaning is part of safe maintenance because the final reset depends on the organizer condition, airflow, and stored item dryness. Returning items to a visibly damp organizer can increase moisture-related problems.
Returning items to a visibly damp organizer can increase moisture-related problems.
Airflow, hidden corners, lids, fabric seams, and metal joints affect how safely an organizer can be reset after cleaning. Lidded containers may retain moisture around lid edges and enclosed areas, while fabric bins need attention to seams where moisture retention can continue after the surface feels dry. Metal joints should be wiped dry after moisture exposure to support rust prevention. The drying approach depends on material, humidity, airflow, and organizer design rather than an exact drying time.
Metal joints should be wiped dry after moisture exposure to support rust prevention.
For example, a lidded container should be checked around the lid and hidden corners before stored items return, while a fabric bin should have airflow around fabric seams before reuse. Drawer inserts should also be checked around liners, compartments, and non-slip surfaces because residue or moisture can remain in enclosed areas. Once the organizer and stored items are dry, resetting can support daily use and clutter prevention without returning moisture to the storage area.
- Check visible moisture: Confirm that drying is complete before returning stored items to the organizer.
- Inspect hidden corners and lids: Check enclosed areas where trapped moisture or residue may remain.
- Allow airflow: Provide ventilation when humidity or material structure slows drying.
- Check fabric seams and metal joints: Inspect areas where moisture retention can affect odour control or rust prevention.
- Confirm stored item condition: Return items only when they are clean and dry to avoid adding moisture or residue.
- Reset the organizer: Replace items after confirming the organizer is ready for safe storage.
This chart shows the main reasons, key inspection points, and final steps for safely drying and resetting organizers to prevent moisture and mold.
Sanitising, Deodorising, and Mould Prevention
Sanitising, deodorising, and mould prevention are different maintenance responses because they address different storage-product problems. Routine cleaning focuses on removing general residue, while sanitising relates to hygiene concerns, deodorising targets an odour source, and mould prevention focuses on moisture conditions. Identifying the problem type first helps determine the appropriate maintenance response.
Identifying the problem type first helps determine the appropriate maintenance response.
Contamination type, odour source, moisture exposure, cleaner compatibility, and ventilation conditions influence the suitable treatment approach. A container with food residue may require attention to hygiene-related cleaning, while a damp storage bin may require moisture control and airflow to address persistent odour concerns. Porous material can retain moisture or residue more easily than some non-porous surfaces, so repeated cleaning may not solve every condition. Avoid unsafe chemical combinations and check cleaner compatibility with the material before applying any treatment.
Avoid unsafe chemical combinations and check cleaner compatibility with the material before applying any treatment.
For example, a bathroom bin in a humid area may need improved ventilation and moisture control, while a food storage container may need attention to residue and hygiene concerns. A fabric storage product in damp storage conditions may require evaluation of moisture retention before further cleaning attempts. If a damaged porous material continues to hold odour or moisture problems after reasonable care, replacement may be safer than repeated cleaning.
| Issue | Likely cause | Safe response |
|---|---|---|
| Sanitising | Contamination or hygiene issue after use | Use a suitable material-compatible cleaning approach and follow care instructions |
| Deodorising | Odour source, trapped residue, or limited ventilation | Address the source, improve ventilation, and reduce moisture conditions |
| Mould prevention | Damp storage, moisture exposure, or poor airflow | Improve moisture control and assess porous material limitations |
Regular Maintenance for Storage Containers and Organizers
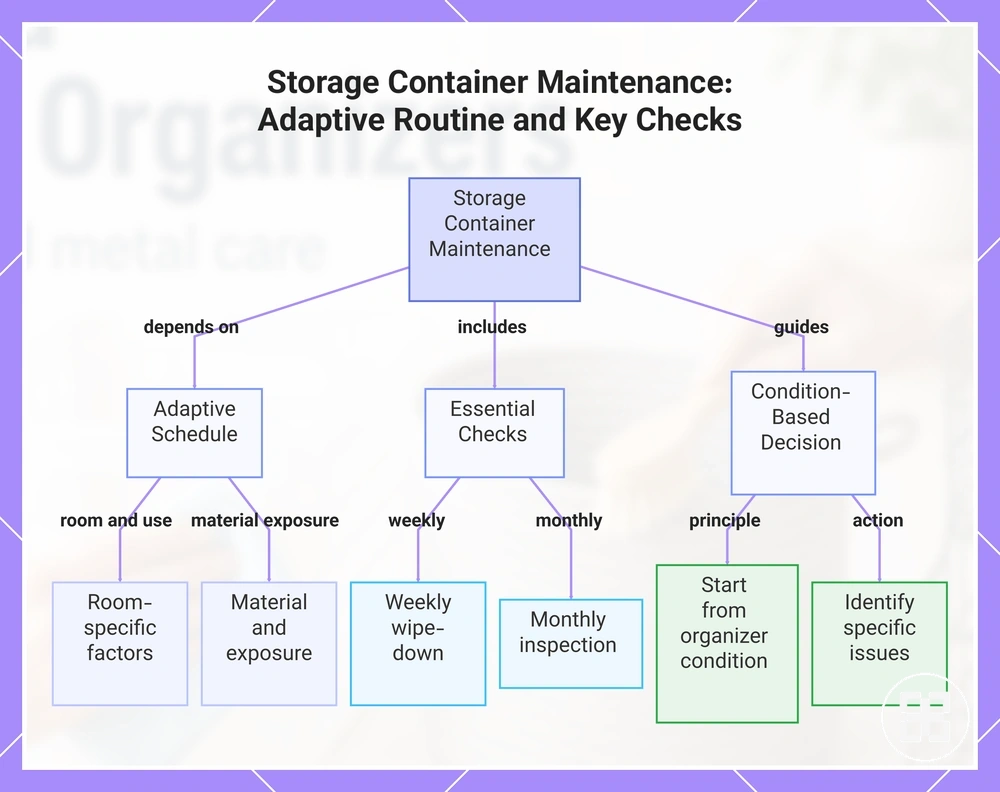
Regular maintenance for storage containers and organizers depends on the room, contents, material, and exposure to dust or moisture rather than a fixed schedule. A maintenance routine should match how organizers are used and the conditions that affect cleanliness, access, and durability. This approach creates a practical upkeep rhythm between deeper cleans.
This approach creates a practical upkeep rhythm between deeper cleans.
For example, pantry organizers may need attention when residue, food particles, or lid fit issues affect stored items, while bathroom organizers may need closer checks because moisture exposure can affect airflow and odour control. Closet organizers may collect dust on fabric surfaces, while office organizers may need attention when crumbs or debris collect in compartments. The inspection interval should change according to use pattern, material, and environmental conditions.
The inspection interval should change according to use pattern, material, and environmental conditions.
Regular Maintenance for Storage Containers and Organizers works best when inspection, wipe-down, label check, lid fit, airflow, item rotation, and load condition are reviewed together. These checks support daily use and clutter prevention by keeping storage accessible and identifying issues before they affect everyday use. More frequent checks may be useful in damp or high-use areas where residue, moisture, or wear appears sooner.
Regular checks help maintain storage care without turning maintenance into a decluttering routine.
A practical maintenance decision starts with the organizer condition rather than a product category. A pantry container with visible residue, a bathroom organizer exposed to moisture, or an office drawer insert with dust buildup each requires a different next step based on the issue. Regular checks help maintain storage care without turning maintenance into a decluttering routine.
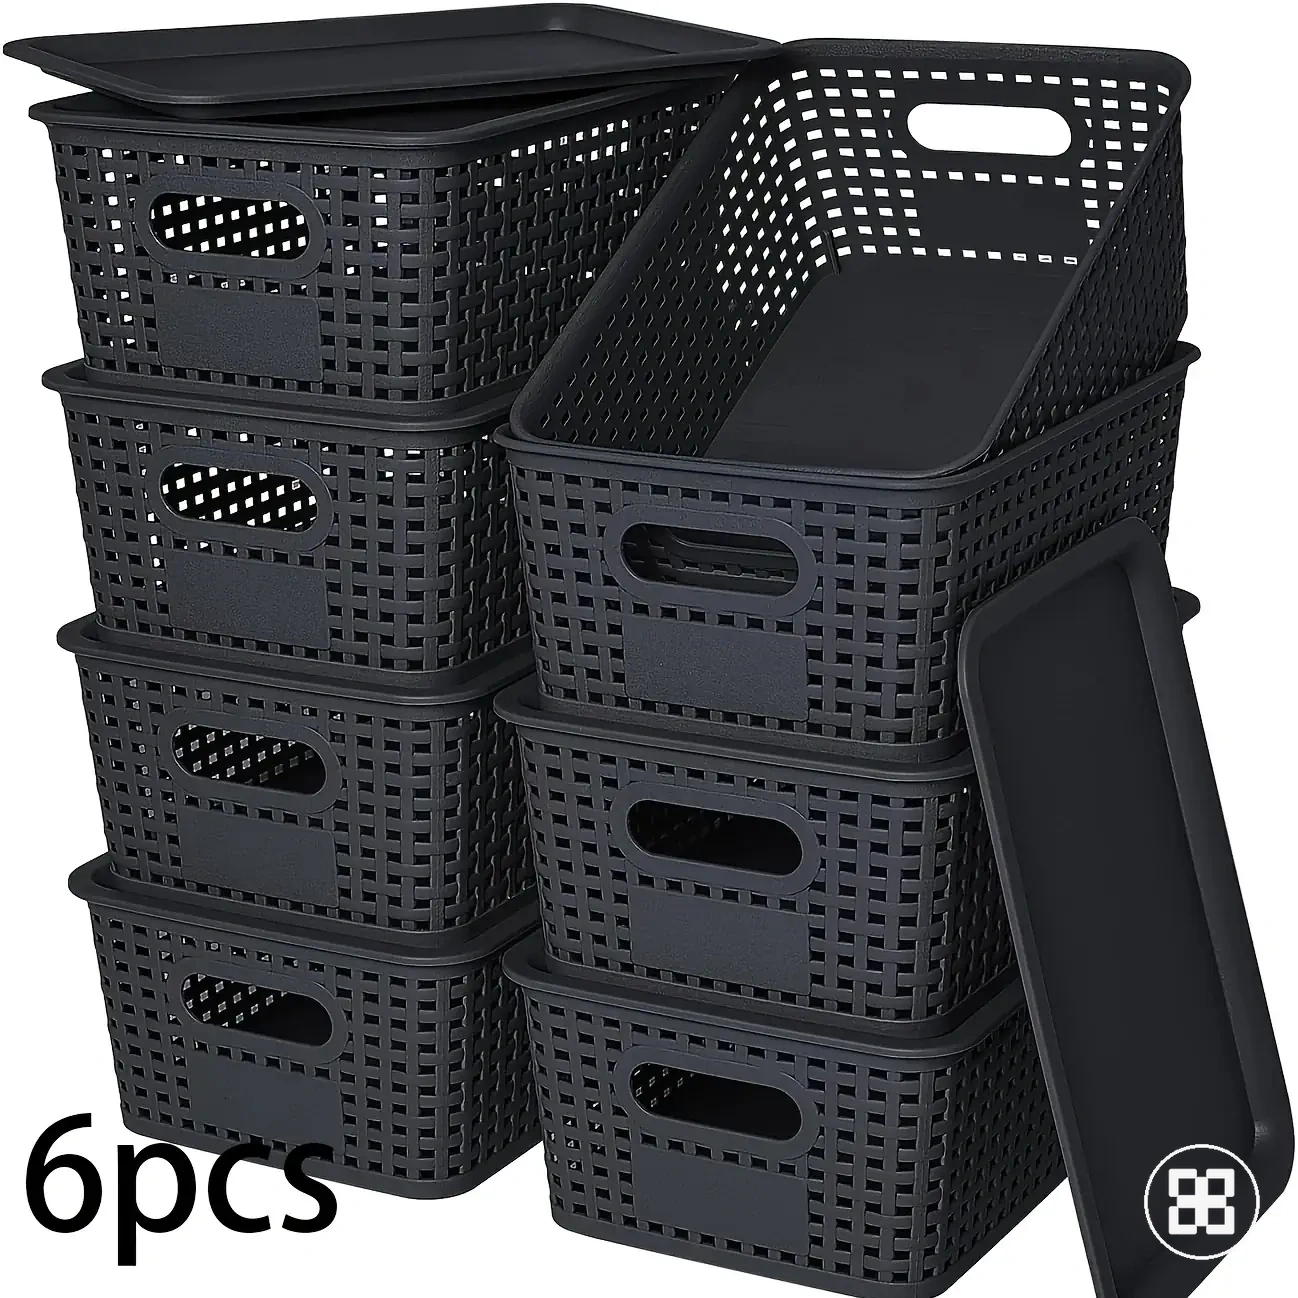
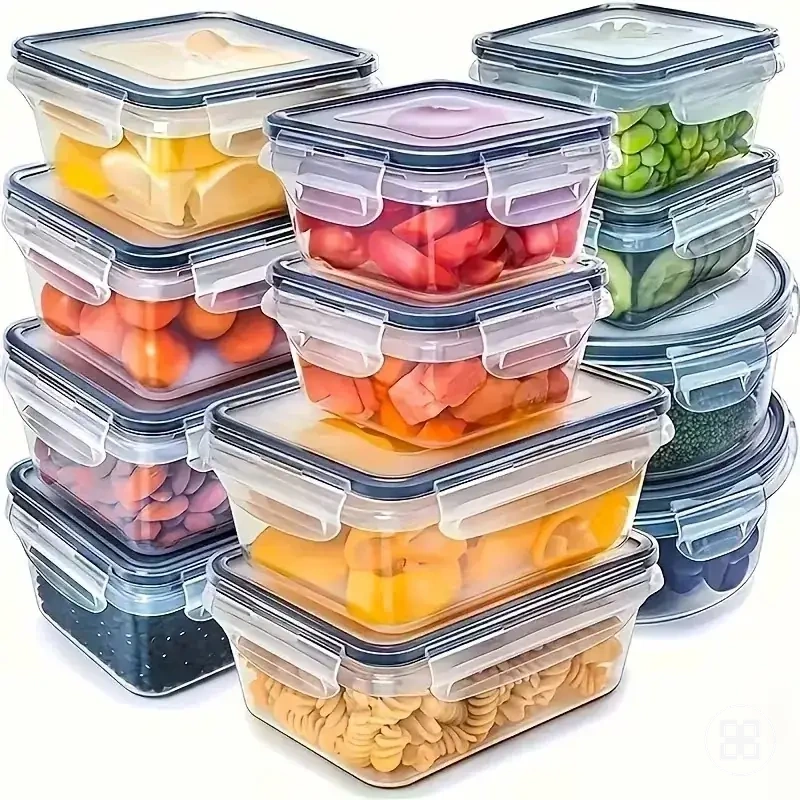
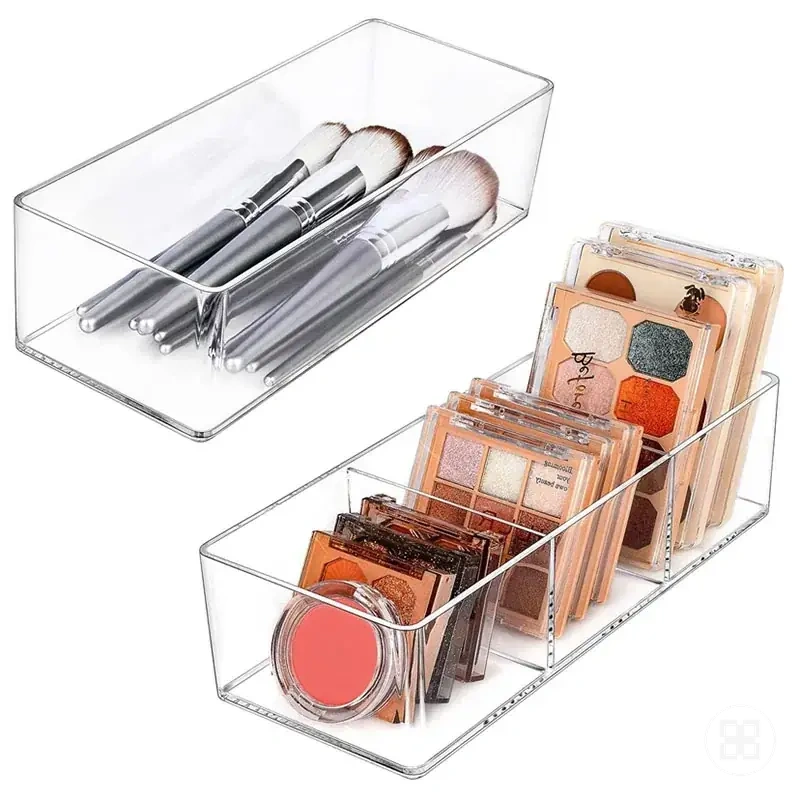
The products below are useful examples for comparing available options.
The products below are useful examples for comparing available options. Before buying, check that the compatibility criteria, key features, and product details match your needs.


- Weekly wipe-down: Check frequently used storage containers and organizers for dust, crumbs, residue, or visible buildup.
- Monthly inspection: Review surfaces, seams, compartments, and areas where debris can collect.
- Lid and label checks: Confirm that lids, labels, and access points remain suitable for current storage use.
- Airflow review: Check ventilation around organizers exposed to humidity or enclosed spaces.
- Item rotation: Review stored items periodically to maintain access and reduce forgotten residue.
- Load and wear review: Inspect signs of wear, changing conditions, or damage that may affect durability.
This chart shows the adaptive maintenance approach for storage containers and organizers, including key inspection checks and the condition-based decision rule.
Preventing Stains, Cloudiness, Rust, and Surface Damage
Most preventable damage to storage containers and organizers comes from material mismatch, stored contents, residue, moisture exposure, or abrasive cleaning. Stains, cloudiness, rust, and surface damage require diagnosis because the cause and affected material determine the realistic maintenance outcome. The table below identifies common damage patterns and prevention actions.
The table below identifies common damage patterns and prevention actions.
Stains often develop when stored contents leave residue that interacts with a surface or when the cleaner choice does not match the material. Food residue, moisture marks, and repeated exposure to unsuitable cleaning approaches can increase staining risk on different organizer materials. Prevention action focuses on matching maintenance choices to the material and addressing residue before it becomes recurring damage.
Surface haze may result from accumulated residue or surface changes, while deeper scratches can affect clarity.
Cloudiness and scratches are common concerns for clear plastic and acrylic containers because abrasive tools or unsuitable contact can alter the visible surface. Surface haze may result from accumulated residue or surface changes, while deeper scratches can affect clarity. Routine maintenance can reduce damage risk, but restoration limits apply when the material itself has been permanently altered.
Reviewing maintenance mistakes can help identify recurring actions that increase surface damage or shorten useful life.
For example, rust can develop around metal joints when moisture exposure remains in connection areas, while mould-prone fabric can be affected by retained moisture and limited airflow. Reviewing maintenance mistakes can help identify recurring actions that increase surface damage or shorten useful life. These conditions require attention based on the material, moisture level, and severity of the damage rather than repeated cleaning alone.
Myth: repeated cleaning can always restore damaged organizers.
Myth: repeated cleaning can always restore damaged organizers. Prevention is usually more realistic before permanent staining, deep scratches, rust damage, or material deterioration occurs. When a surface condition cannot be improved through normal maintenance, replacement may be considered based on the damage level and material condition.
Before buying, check that the compatibility criteria, key features, and product details match your needs.
The products below are useful examples for comparing available options. Before buying, check that the compatibility criteria, key features, and product details match your needs.
| Problem | Likely cause | Affected material | Prevention action | Limit or outcome |
|---|---|---|---|---|
| Stains | Stored contents, residue buildup, or material mismatch | Plastic, fabric, and other storage surfaces | Match maintenance methods to the material and address residue early | Permanent staining may remain after repeated cleaning |
| Cloudiness | Abrasive tools, unsuitable contact, or surface changes | Clear plastic and acrylic | Avoid abrasive cleaning and protect surface clarity | Surface haze may not be reversible when the material has changed |
| Rust | Moisture exposure around metal joints or unfinished areas | Metal organizers and wire components | Reduce moisture exposure and maintain dry surfaces | Corrosion damage may require further assessment |
| Scratched surfaces | Rough tools or abrasive contact | Clear plastic, acrylic, and coated surfaces | Use suitable cleaning materials and avoid surface abrasion | Deep scratches may affect appearance and clarity |
| Mould-prone fabric | Moisture retention and limited airflow | Fabric organizers and porous materials | Improve ventilation and reduce damp storage conditions | Persistent material damage may require a replacement decision |